Expert E-learning Content Development 2026

You know the feeling. You have real expertise, a course idea people need, and a rough outline in your head. Then the work begins. Scripts, slides, quizzes, reviews, recording, revisions, LMS setup, learner feedback. What looked simple turns into a chain of decisions that can waste weeks if you make them in the wrong order.
That is why e-learning content development needs a disciplined process, not just enthusiasm. Most course problems do not start in production. They start much earlier, when the creator skips audience analysis, writes fuzzy objectives, overloads slides, or chooses media because it looks impressive instead of because it teaches well.
The upside is real. The global eLearning market has grown 900% since 2000 and is valued at about $325 billion as of 2025, with corporate eLearning projected to grow 250% by 2026 according to these eLearning market statistics. Bigger demand creates bigger opportunity, but it also raises the bar. Learners compare your course to every polished product they have seen before.
When creators get stuck, they often jump to tools first. They start browsing authoring apps, LMS themes, and software for creating educational videos before they have decided what the learner must do differently by the end. That sequence creates busywork. Good tools help. A clear development workflow helps more.
The strongest courses I have seen are not the most cinematic. They are the most deliberate. They respect time, reduce confusion, and make application feel immediate. That is the standard worth aiming for.
The High-Stakes World of E-Learning Content Development
E-learning content development sits at the point where expertise meets execution. Subject matter knowledge is not enough. Plenty of experts know their topic well and still build courses that feel bloated, vague, or exhausting to complete.
Why the implications are greater than they seem
A course is not just information packaged into modules. It is a sequence of decisions about pacing, examples, visuals, practice, and assessment. If those decisions are sloppy, learners feel it fast.
The common failure pattern is predictable:
- Too much content: The creator tries to include everything they know.
- No priority: Nice-to-know material sits beside must-know material with equal weight.
- Weak practice: Learners watch and read, but rarely do.
- Late feedback: Problems surface after recording, design, and upload, when fixes are expensive.
That is why process matters. A strong workflow protects your time and the learner’s attention.
What winning creators do differently
They do not treat content development like a creative free-for-all. They build around constraints. Time available. Learner motivation. Device limitations. Context of use. Desired behavior change.
Tip: If a learner can finish a lesson without making a decision, solving a problem, or applying a concept, the content is probably too passive.
The best developers also accept a hard truth. Learners are not waiting around to admire your course structure. They are trying to solve a problem, pass a requirement, improve at work, or get unstuck. E-learning content development works when it moves them toward that outcome quickly and clearly.
That shift changes everything. It affects how you write scripts, how much text goes on screen, which examples you choose, and whether you build a video, a scenario, or a downloadable job aid.
Start with Strategy Before You Start Creating
Before opening PowerPoint, Rise, Google Slides, or your recording setup, decide three things: who this is for, what they need to do, and how tightly the course should be structured.
Get specific about the learner
Many courses fail because the target audience is defined too broadly. “Beginners,” “employees,” and “small business owners” are not enough. You need operating context.
A better audience definition includes:
- Current skill level: What do they already know, and what do they regularly get wrong?
- Time reality: Are they studying in focused sessions or in scattered minutes between tasks?
- Environment: Mobile, desktop, quiet office, retail floor, clinic, home.
- Motivation: Required training, career growth, immediate business need, certification, curiosity.
- Friction points: Language barriers, low confidence, poor internet access, tool fatigue.
Traditional frameworks often underplay cognitive load for people learning under pressure, so these factors are important. The challenge is especially obvious for adults balancing work and education. This discussion of underserved online learners highlights a real gap in guidance for people learning in fragmented time, such as a professional using a 15-minute break.
If your learner only has short windows, long explanatory lessons are a design mistake, not just a style preference.
Write objectives that drive decisions
I start every module with a plain-language objective. Not “understand social media strategy.” That is too vague. Better: “Draft a one-week posting plan for a local business using one core offer and one audience segment.”
Good objectives make production easier because they tell you what belongs in the lesson and what does not.
Use this simple test. By the end of the module, can the learner:
- Explain a concept in their own words
- Choose between options
- Perform a task
- Diagnose a mistake
- Create something usable
If the answer is unclear, the module is not ready to script.
For a deeper planning lens, I like a learner-centered strategy that maps objectives to learner needs before media choices. This guide on learner-centered strategy is useful because it keeps the design conversation anchored in outcomes instead of features.
Pick a framework that matches the job
Some projects need a formal design cycle. Others need rapid iteration with fast feedback loops. Do not force every course into the same model.
Instructional Design Models at a Glance
| Aspect | ADDIE (Linear) | SAM (Iterative) |
|---|---|---|
| Best fit | Compliance, complex training, multi-stakeholder review | Fast-moving topics, pilot programs, lean teams |
| Workflow style | Sequential and structured | Cyclical and adaptive |
| Strength | Documentation and control | Speed and course correction |
| Risk | Slow revisions if early assumptions are wrong | Can drift without strong objectives |
| Review rhythm | Heavier review at stage gates | Frequent review in smaller cycles |
| My take | Better when accuracy and governance matter most | Better when learner feedback needs to shape the build quickly |
Key takeaway: The framework should serve the project. It should not become the project.
When teams skip strategy, they end up rewriting scripts after production starts. That is the most expensive place to discover confusion.
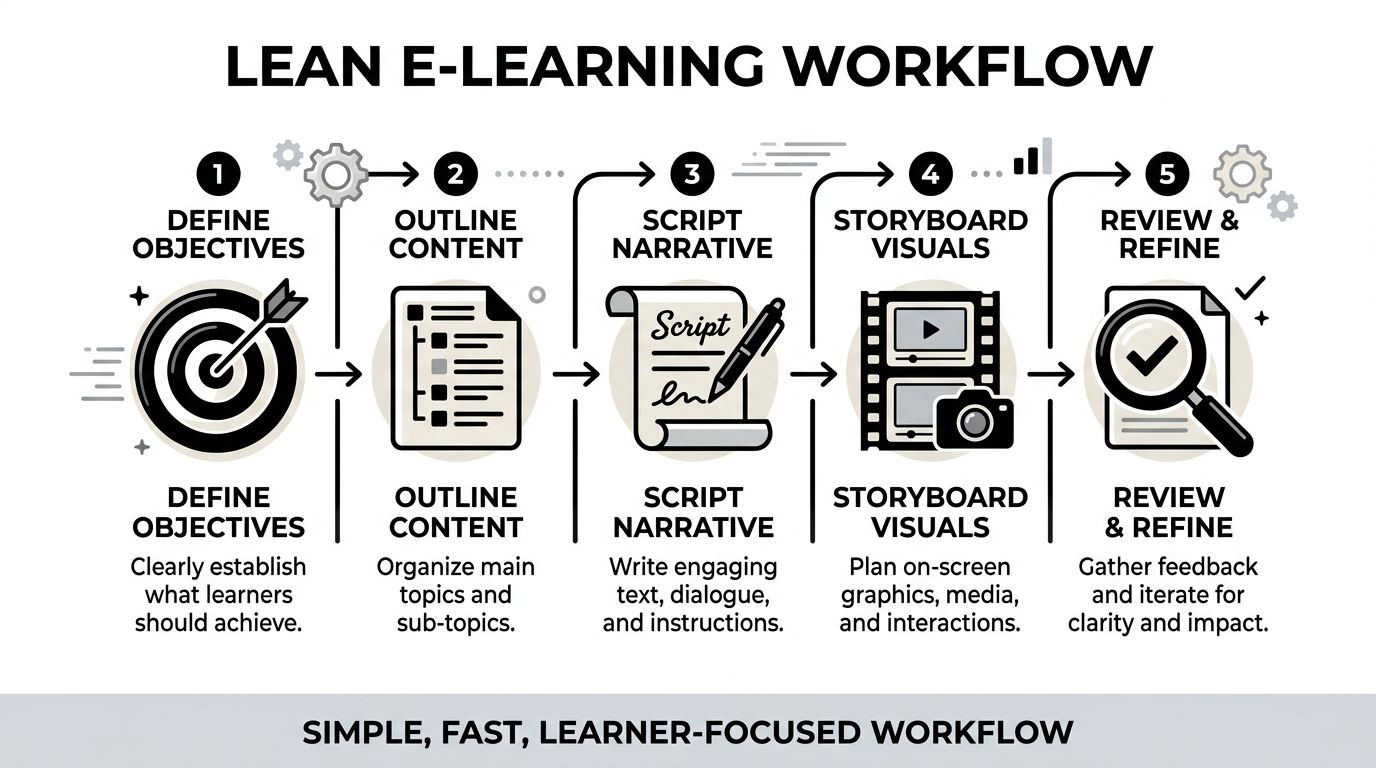
The Lean Workflow for Scripting and Storyboarding
My preferred workflow is simple because complexity creates delay. A lean process keeps the course learner-focused and catches problems before they become design work, recording work, or LMS cleanup.
The version below is low-tech on purpose. Fancy software is optional. Clear thinking is not.
Use one working document until the structure is stable
I begin in a Google Doc. First the learning objectives. Then a high-level outline with module titles and key topics. Then the full voiceover script in that same document.
That matters more than it sounds. Splitting planning across too many tools too early makes version control messy. I want one place where the logic of the lesson is visible from top to bottom.
My scripting rules are blunt:
- Keep sentences short
- Write conversationally
- Aim for fewer than 150 words per slide
- Read every slide aloud before approving it
If a sentence feels awkward in your mouth, it will feel awkward in the learner’s ear.
Turn the script into a storyboard, not a design file
After the script is stable, I move into a simple storyboard table in Google Sheets or Notion. I use these columns:
| Slide # | Script | Visuals | On-screen text | Interactivity | Estimated duration |
|---|
That is enough detail to guide production without overbuilding too soon.
The important discipline here is what goes into each column.
- Script: Full narration only.
- Visuals: What the learner sees. Diagram, screenshot, icon sequence, highlighted UI, scenario card.
- On-screen text: Keywords only. Not transcript text pasted onto the slide.
- Interactivity: Quiz, reflection, click-to-reveal, scenario choice, drag-and-drop.
- Estimated duration: Helps you spot bloated sections before recording.
Many courses get cleaner once the script and visuals sit side by side; weak slides become obvious. You can see repetition. You can see where narration explains one idea while the screen shows another. You can spot when a lesson needs a quick check for understanding.
Review before you produce
I send the storyboard to 2 to 3 target learners for fast feedback before production. Not a committee. Real learners.
I ask simple questions:
- What felt confusing
- Where did your attention drop
- Which examples made sense
- What would help you apply this immediately
That small review loop is one of the cheapest improvements you can make.
The broader principle is backed by collaborative development research. Using standardized templates and metadata tagging can cut development timelines by 40% to 60%, reduce revisions by 30%, and shorten storyboarding from weeks to days according to this collaborative documentation breakdown.
If your team needs a more formal foundation under this workflow, this guide to the training ADDIE model is a solid reference point. I still prefer to keep the actual scripting workflow lightweight.
Tip: Storyboards should answer teaching questions, not decorate them. If a storyboard spends more effort on transitions than on learner decisions, it is drifting.
Why this lean method prevents expensive rework
Rework gets expensive when you discover problems after voiceover, design, interactivity, or LMS upload. A lean workflow catches those issues while everything is still editable in a document.
The biggest advantages are practical:
- Faster approvals: Stakeholders react to a simple plan more quickly than to half-built media.
- Cleaner production: Designers and editors know exactly what to build.
- Better pacing: Estimated durations reveal where modules need trimming.
- Stronger alignment: Objectives, script, visuals, and interactions stay connected.
For e-learning content development, this is the difference between “we built a course” and “we built a course that learners can finish and use.”
Selecting Media with the Best Return on Investment
Most creators overspend attention and budget on the wrong media. They chase production value instead of learning value.
The best return usually comes from clear narration, clean visuals, and purposeful interactivity. Not from flashy editing. Not from long talking-head video. Not from animation for its own sake.
What consistently performs well
If I had to rank media by practical ROI, this is the order I would start with.
Voiceover with simple slides
This is the workhorse. Strong audio plus focused visuals teaches well, costs less to produce, and is easier to revise later.Screen recordings and demonstrations
For software, workflows, dashboards, or step-by-step procedures, this format builds confidence fast. Learners can see exactly what to do.Interactive checks
Short quizzes, scenario choices, drag-and-drop activities, and reflections often punch above their weight. They force recall and decision-making.Short animations
Useful when a concept is hard to visualize. I use them selectively for processes, systems, or cause-and-effect explanations.
What underperforms for the effort
Pure talking-head video often looks professional and teaches poorly unless the instructor is unusually compelling and the lesson is tightly edited. Heavy animation has a similar problem. It can absorb a huge amount of production time without improving understanding.
I have seen learners tolerate simple slides with excellent instruction. I have also seen them abandon beautiful content that wastes time.
That is why I treat media as a support choice, not a branding choice.
Match the medium to the learning task
The easiest way to choose media is to ask what the learner must do next.
- If they need to follow a software process, record the screen.
- If they need to recognize patterns, show examples side by side.
- If they need to make judgments, build a scenario.
- If they need to remember a sequence, break it into short visual steps.
- If they need to apply on the job, add a worksheet, template, or challenge.
This is also where current e-learning trends support what many practitioners already see. Microlearning increases learner engagement by 25%, interactive content like quizzes gets 20% higher engagement than static content, and AI assistants can generate course content up to 9x faster from source material according to Articulate’s 2025 e-learning trends.
I would add one practical caution. AI can accelerate first drafts, but it cannot decide what learners need. Use it to speed up structuring and rewrite passes. Do not let it replace instructional judgment.
Key takeaway: Choose media by teaching function. If a format does not improve clarity, confidence, or practice, it is probably extra work disguised as quality.
From Production to Platform How to Publish Your Course
Production is where many creators lose discipline. They finally have a storyboard, then they start improvising. New slides appear. Scripts drift. Quizzes get added because they “might be useful.” Keep the build faithful to the plan unless testing reveals a real problem.
A practical production stack
You do not need a complicated setup to produce solid learning content.
A lean stack might look like this:
- Google Docs for script development
- Google Sheets or Notion for storyboarding
- Audacity for recording and cleaning voiceover
- A Fifine mic or any reliable USB microphone for narration
- Google Slides for straightforward slide-based lessons
- Rise 360 for polished, responsive course layouts
- Simple screen recording software for software demos and walkthroughs
The goal is consistency. Learners forgive modest visuals faster than they forgive muddy audio, confusing pacing, or inconsistent structure.
Publish in a way that preserves the learner experience
Once assets are ready, the publishing job is not just “upload files to an LMS.” You need to think about sequencing, access, content types, and learner flow.
Check these before launch:
- Content order: Does the learner see foundational material before higher-stakes tasks?
- Navigation: Can they tell where they are, what is next, and what is optional?
- File weight: Are videos and downloads practical for the audience’s devices and connection quality?
- Assessment timing: Are quizzes placed where they reinforce the lesson instead of interrupting it?
- Completion logic: Does the platform clearly track progress and unlock the next step appropriately?
Think about standards and portability
If your course uses packaged content, understand how your files will behave in the LMS before launch. SCORM still matters in a lot of workflows because it affects tracking, compatibility, and reporting. This explanation of what is a SCORM file is a useful refresher if you are publishing beyond simple video lessons.
Just as important, keep your source files organized. Store:
- final audio
- edited scripts
- slide decks
- exported media
- assessment copy
- thumbnails and downloads
- version notes
Creators get into trouble when the published lesson is the only clean copy they can find.
Build for maintenance, not just launch
A good course is easy to update. That means modular lessons, named assets, reusable templates, and clear filenames. It also means resisting the urge to cram too many ideas into one video or one lesson page.
When content changes often, modular design wins. You replace one short lesson instead of reopening an entire course. You re-record one screen demo instead of rebuilding the whole module. That is a production choice that pays off long after launch day.
Publishing is not glamorous, but it is where a course either becomes usable or becomes frustrating. Tight sequencing, clean files, and predictable learner flow matter just as much as the script.
Designing Effective Assessments and Inclusive Content
A course is not finished when the lessons are recorded. It is finished when the learner can prove they understood something meaningful and when the content is usable by the audience you claim to serve.
Build assessments that test judgment, not just memory
Weak assessment design usually looks like this: a lesson explains a concept for ten minutes, then asks a definition question that can be answered by guessing or parroting terms.
That tells you very little.
Better assessments ask the learner to do one of three things:
- Choose the best response in a realistic situation
- Identify an error in a process, example, or piece of work
- Apply a rule to a new case, not the same case used in teaching
Different formats serve different purposes. Multiple choice works for recognition and discrimination. Matching can test associations. Fill-in-the-blank is helpful when exact terminology matters. Ordering is useful for process steps. Listening items matter when the learner must interpret spoken content, not just read it.
For regulated programs, I also recommend studying examples from fields where misunderstanding has real consequences. This roundup on Compliance Training Best Practices is useful because it pushes assessment toward scenario-based thinking instead of checkbox recall.
Accessibility starts in the script
Accessibility is not something you add at the end. It starts when you write.
Practical habits make a big difference:
- Use plain language: Short sentences reduce confusion.
- Keep on-screen text minimal: Dense slides punish everyone, especially struggling readers.
- Write descriptive visual notes: If a graphic matters, plan how its meaning is conveyed in narration.
- Use captions and transcripts: They help more learners than most creators expect.
- Avoid color-only meaning: Labels and contrast matter.
Tip: If a learner turned the audio off, would the lesson still make sense? If a learner could not rely on the visuals, would the narration still carry the core idea?
Design for inclusion beyond accessibility
Inclusive e-learning content development also means respecting context. Some learners are on mobile. Some are in multilingual environments. Some have unstable internet. Some are returning to learning after years away.
That changes content design.
For example:
- Chunk lessons so learners can stop and resume without losing the thread.
- Offer downloadable supports when possible.
- Use examples that do not assume one culture, one device type, or one workplace setup.
- Avoid unnecessary idioms and region-specific references if the audience is broad.
A course can be technically accessible and still feel exclusionary. The fix is not fancy. It is thoughtful planning and restraint.
Measure and Optimize Your Content with Learner Data
Launch is not the finish line. It is the moment your assumptions meet reality.
The biggest improvement I have made across courses came from testing early, then watching learner data without getting defensive about it.
Test with real learners before full release
I like a two-step approach.
First, an alpha test. Send the first one or two modules to a small group from the target audience. Ask what confused them, what felt too long, whether they could apply the material, and whether anything broke technically.
Then a beta test with a small paid group. Paid beta learners usually behave more like real customers. They show where motivation drops, where modules drag, and where examples fail to connect.
In one course, beta testers pointed out that a module was too technical. After simplifying the language and adding better examples, the module’s completion rate improved. That kind of feedback is much more useful than generic praise.
Track the signals that reveal friction
The right metrics depend on the course, but several signals consistently matter:
- Lesson completion patterns: Where do learners stop?
- Assessment misses: Which questions fail repeatedly?
- Review behavior: Which lessons do people revisit unusually often?
- Time spent: Where does progress slow down unexpectedly?
- Device or context issues: Are learners struggling in a particular usage pattern?
According to Techinnov’s analysis of user-performance data in e-learning, integrating analytics into structured revisions can produce a 25% to 35% uplift in completion rates by helping developers identify friction points through metrics like lesson failure rates and content review counts. Analytics thus integrates into e-learning content development, not just reporting.
That finding matches what experienced course teams already know. Learners usually tell you where the problem is. Data tells you how serious it is and how often it happens.
Optimize in small, deliberate passes
Do not rebuild the whole course after one rough launch. Fix the most visible sources of drag first.
A smart revision cycle often looks like this:
- Trim bloated lessons
- Rewrite confusing assessment items
- Add examples where learners hesitate
- Insert a quick interaction before drop-off points
- Improve transitions between lessons
Small changes compound. A clearer example, a shorter explanation, or a better practice item can lift the whole experience.
The best courses are not static products. They are maintained learning systems. That mindset keeps your content honest, current, and useful.
If you want a self-hosted platform to publish, sell, and manage your courses without vendor lock-in, Mentor LMS is worth a close look. It supports solo course sites and multi-instructor marketplaces, includes course and exam tools, gives you storage flexibility, and lets you own your platform outright instead of renting it month after month.